Popular Posts

Friday, July 18, 2014

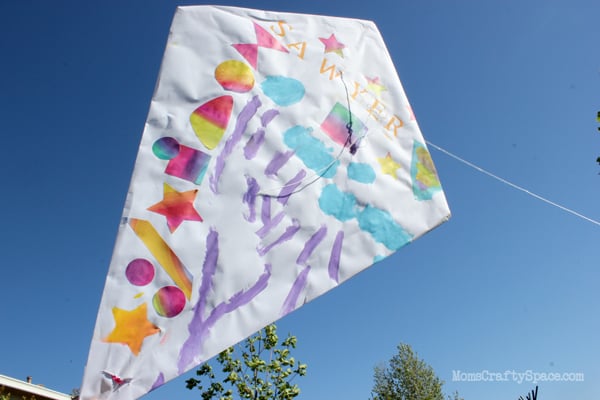
Kite Craft

Kite Craft
by All Kids Network

Objective:
Your task is to make a customized paper kite

Materials:

  • Construction Paper
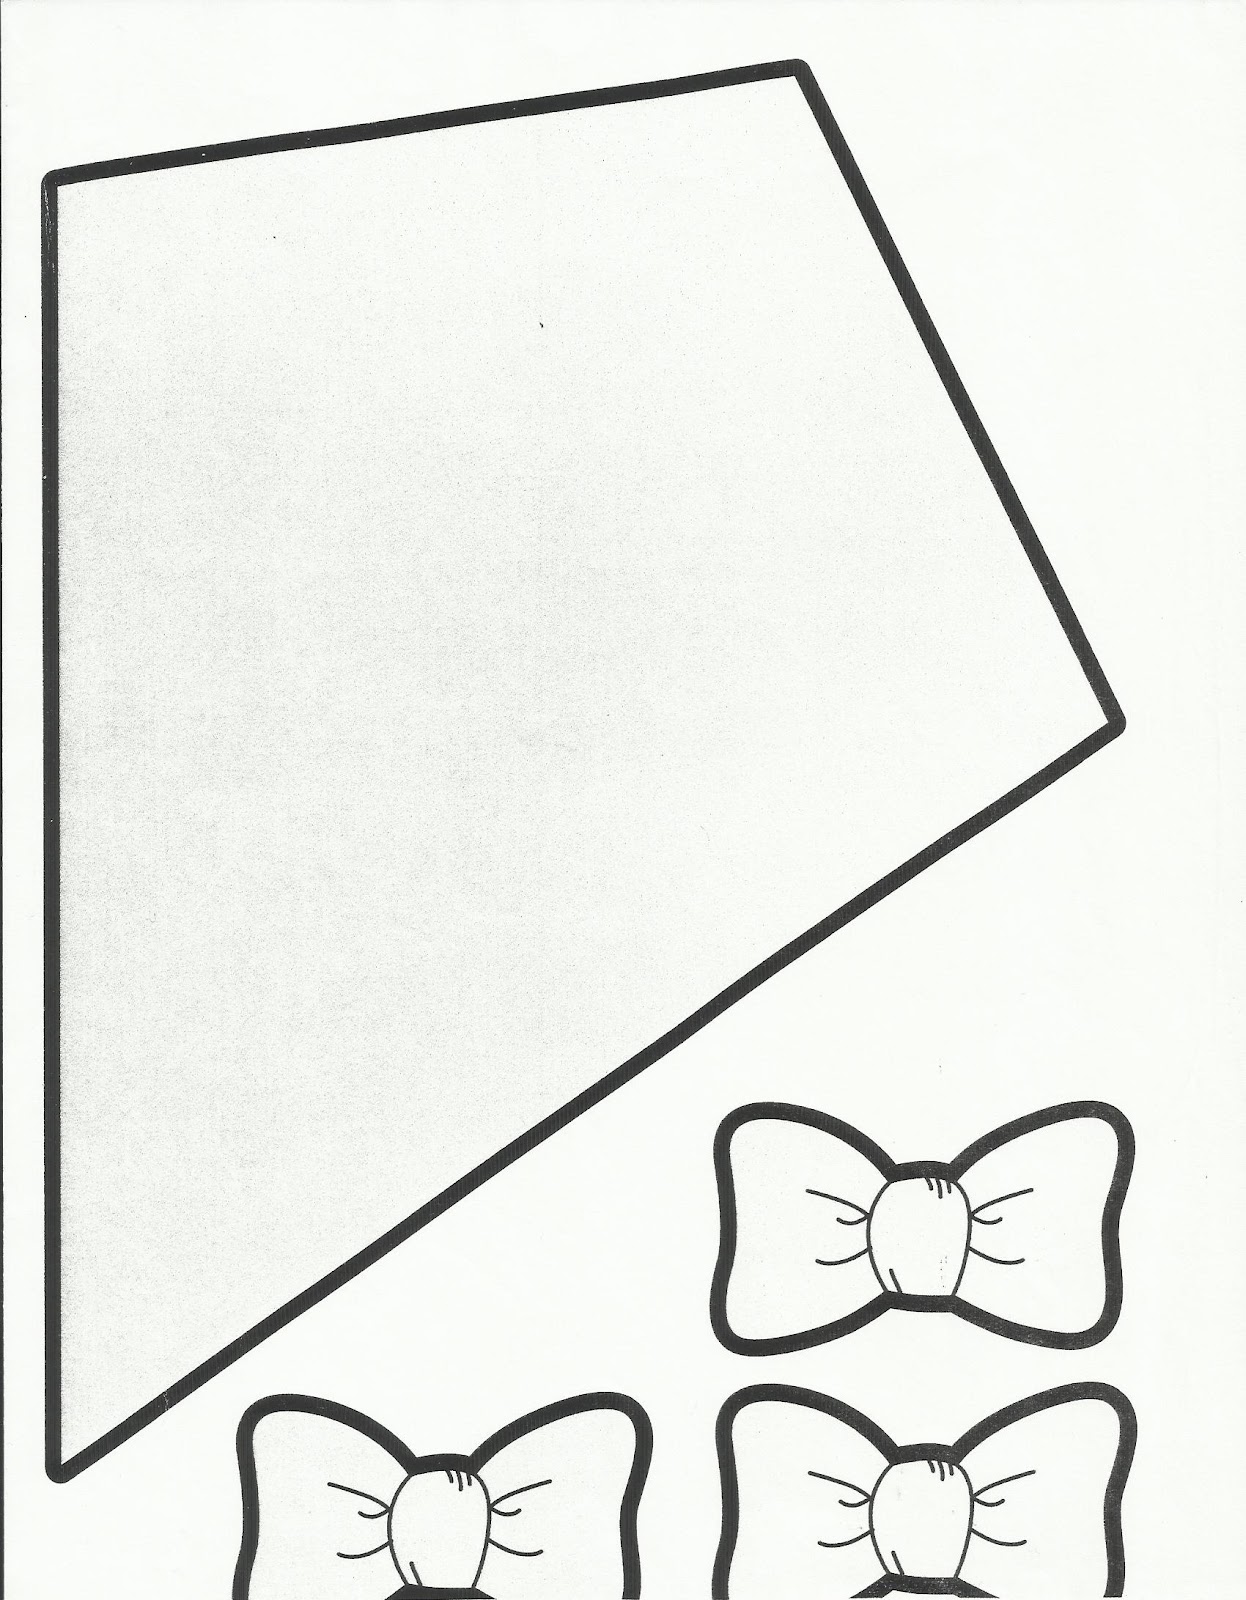
  • Kite Template
  • Scissors
  • Glue
  • Scotch Tape
  • Ribbon or Yarn
  • Crayons or Markers
  • Decorations: Craft Foam, Beads, Sequins, etc.
Detailed Instructions:
  1. Trace the kite template onto construction paper and cut it out
    • Use any color you would like
    • Also, trace the bows onto construction paper and cut them out
  2. Have the kid color and decorate the kite any way they like
  3. When the kite is finished being decorated, tape a short section of string to the back of the kite
  4. Tape the bows onto the string using small pieces of tape
Purpose:
Kids should be flying kites, not fighting cancer!

Kite Template (and ribbons):

Link:
http://www.allkidsnetwork.com/crafts/spring/kite-craft.asp

Thursday, July 17, 2014

Dream Catcher

Dream Catcher
by Kim King (4 Crazy Kings)

Snare those nightmares for good with this Sweet Dreams Beaded Dream Catcher!

Objective:
Make a paper dream catcher

Materials:

  • Paper Plate (plain or colored)
  • Scissors
  • Yarn
  • Feathers
  • Beads
  • Hole Punch
  • Stickers or Markers (optional)
  • Crayons (optional)

Detailed Instructions:
  1. Cut a hole in the center of the plate, leaving about two inches of edging
  2. Punch holes around the inside edge
  3. Tie a piece of yarn to the end of the feather. The length of the yarn will determine how far down your dream catcher hangs.
  4. String beads onto the yarn. When you're finished, tie several knots at the loose end of the string to act as a stopper and secure the beads in place
    • Tip: Roll a piece of tape around the tip of the yarn, like an anglet on a shoelace, before starting. This helps young kids slide the beads on, saving time - and frustration!
  5. Repeat step 4 until you have your desired number of strands
  6. Randomly string your remaining yarn through the holes bordering the plate. Add a few beads or stickers for extra decoration, if you like.
  7. Punch one hole for each beaded strand of yarn at the bottom of the plate and tie on your strands of beaded, feathered yarn
  8. Note: You can choose to decorate the dream catcher how ever you like by coloring it and/or adding stickers on it
Purpose:
To get rid of those pesky nightmares.

Link:
http://www.pbs.org/parents/crafts-for-kids/dream-catcher/

Wednesday, July 16, 2014

Airplane Piggy Bank

Airplane Piggy Bank
by Jessica (Brightnest)


Objective:
Your task is to make a piggy bank plane made of a water bottle

Materials:

  • empty plastc bottle (preferably a 500 mL water bottle)
  • thick paper (same thickness as that of a card)
  • double-sided tape
  • scissors
  • pencil

Detailed Instructions:

  1. Make a Coin Slot
    • Cut a rectangular slot about 1 inch long and a ½-inch wide in the side of the bottle. This is where you’ll drop coins into the piggy bank, so make sure it’s large enough to fit at least two quarters side-by-side.
  2. Design the Fuselage of the Plane
    • Draw two identical pieces for the back half of the plane that look like upside-down Ls. (These pieces are going to make up the back half of the fuselage and the plane’s rudder.)
    • Tip: Draw one side, and then use it as a stencil to draw the second side. That way, both pieces will be identical.
  3. Attach the Paper Fuselage and Rudder
    • Once the two pieces are cut, attach them to the plastic bottle with two-sided tape. Pay attention to where the coin slot is – you’ll need to cut into the paper over the coin slot opening
  4. Draw and Cut Two Engines
    • Draw two identical rectangles about 4 inches long and 1 inch thick on card stock paper. These are going to be your engines. 
    • Cut the rectangles out and then roll them into long tubes. 
    • Tape the tubes, and then attach them to the plastic bottle, one on either side. 
    • Note: You want your tubes to touch the “ground” because the engines also serve as “feet” to stabilize the plane piggy bank.
  5. Draw and Cut Two Wings
    • Draw two identical triangles with rounded tips on your card stock paper, which will become your wings. Cut them out and attach the wings above the engines.
    • Tip: It helps to fold a tab on the long edges of the cones for easy attachment.
  6. Draw and Cut the Plane Propeller
    • Using the bottle cap as a guide, draw your plane propeller. The bottle cap is going to secure the propeller onto the bottle, so you want the circle opening to be slightly smaller than the cap so it doesn't slip over it.
  7. Add Any Details
    • You now have a basic plane, but you can add some personality with extra card stock paper! Draw, cut out and affix windows and back wings. Let your child flex their creative muscles and draw faces in the windows.

Link:
https://brightnest.com/posts/for-kids-make-a-unique-piggy-bank-out-of-a-plastic-bottle

Wednesday, July 9, 2014

Super Puppet Heroes

Super Puppet Heroes
by Roxette Joy Angelia


Objective:
The task is to make a superhero "puppet"

Materials:

  • Colored Paper
  • Colored Board
  • Coloring Materials
  • Designing Materials
  • Other Art Materials (Yarn, Buttons, etc.)
  • Glue
  • Scissors
  • Popsicle Sticks

Detailed Instructions:
  1. As an initial interaction, ask the kid who his favorite superheroes are and why he picked them.
  2. Draw the characters on the colored paper or board and use coloring materials to design them. 
  3. You may also use other art materials for the body parts of the superheroes, such as buttons for eyes, yarn for hair, etc.
  4. If the kid wishes to do so, you may also create characters other than superheroes, such as animals, people, and others.
  5. When the character designs are finished, attach the figures to the popsicle sticks to imitate puppets.
  6. If there is time remaining during the visit, you may play make-believe with the kid using the characters/superheroes using different scenarios and funny voices.
Purpose:
Through this kind of interaction, the Kyther will be able to include the kid in the decision-making, such as what color of paper the characters should be drawn on and what they should look like. Through this, the kid can feel that he is capable.

Paint Me A Photo(shoot)

Paint Me A Photo(shoot)
by Jamia Ramziz Amin


Objective:
The task is to make Superhero costume/s with and for the kids

Materials:
  • Colored Paper
  • Crepe Paper
  • Scissors
  • Glue
  • Crayons
  • Rubber bands
  • Camera

Detailed Instructions:
  1. Plan with your kid - ask him/her if he/she would like to be his/her own superhero, or if he/she would like to be his/her favorite superhero. For the Kyther, either be the villain or his/her sidekick (depends on kid's mood).
  2. Use the art materials to make your masks and/or logo and/or cape and/or disguise. Design together! Make sure to help your kid if he/she is unable to design on his/her own.
  3. Put everything on and be in character! It should be fun if both of you will play along!
  4. Think of poses with your kid (hero vs villain/ heroes saving the world) then photo-op! 
    • IMPORTANT REMINDER: Ask permission from the parent (and the CLC) first if you are allowed to take photos of his/her child. If not, skip the photo-op.
  5. You may also just play with the child using the toys from the ViBag (those that do not require physical play) like the playing cards, but make sure to play in character! If you are a villain, the scenario would be hero vs villain. If hero wins the game, hero saves the world. If you are a team, the scenario would be helping each other to win against evil forces.
  6. You can do anything; the point is to be in character, and this would hopefully engage the child even in just conversation!
Purpose:
The point is bonding over the experience of being in character, which would hopefully encourage conversation and interaction. The child will also hopefully feel stronger like his/her superhero even just for a short time. This activity is very flexible!